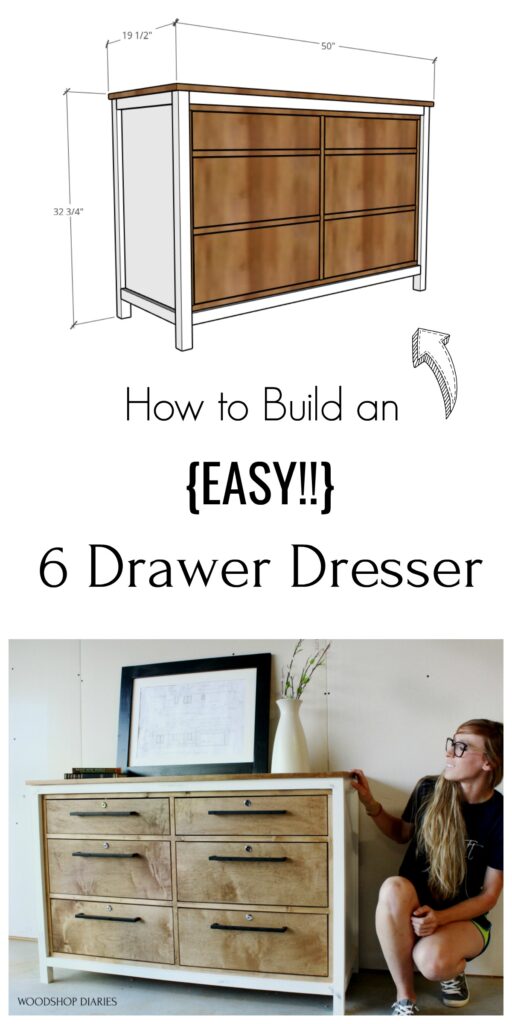
Plans for 6 Drawer Dress
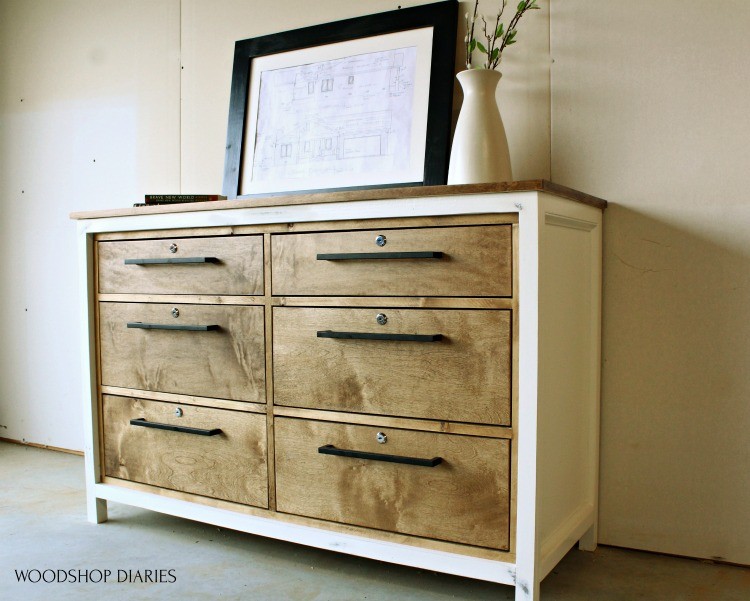
Bank check out this super simple, two tone 6 drawer dresser build! I've got the building plans for you to build your own correct hither in this post!
If yous haven't already noticed, I love building dressers. Here's a few of my favorites:
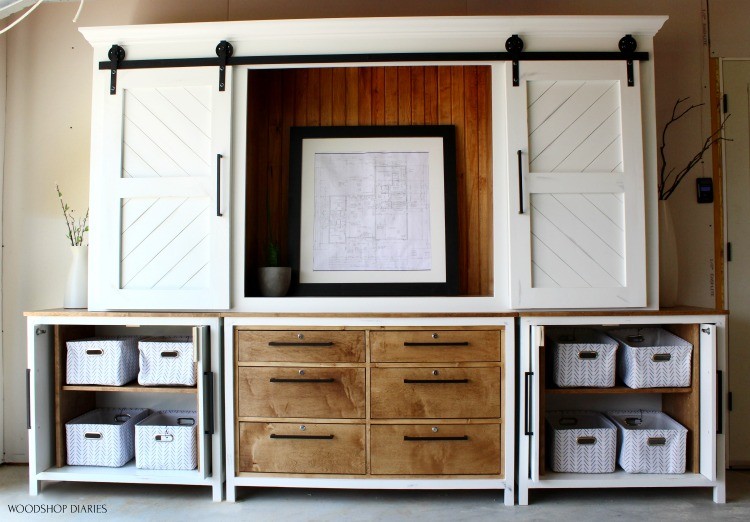
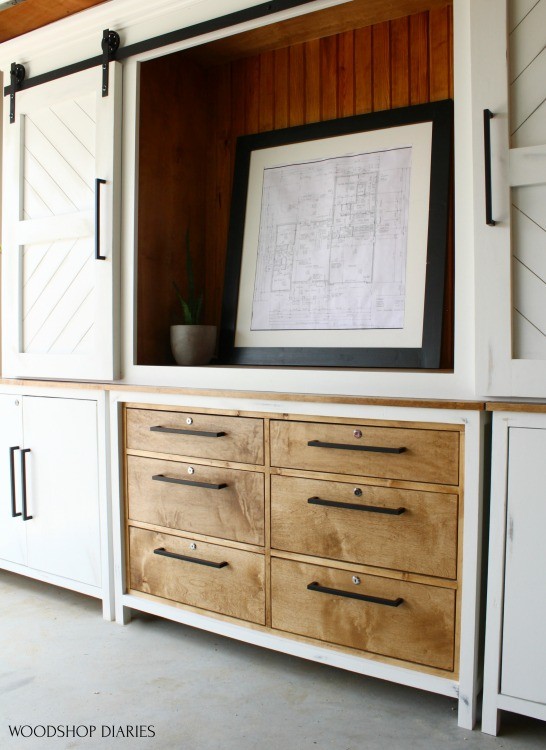
But this dresser I'k sharing at present is actually just ane part of a large entertainment blazon center I'm edifice for a local library. See it there in the heart at the bottom??
.
RELATED: Check out plans for a similar entertainment eye here.
One time you lot're finished hither, be sure to head over to this post to check out that pocket door cabinet and to this postal service to see how the sliding door cabinet on tiptop was fabricated, but in the mean time, allow's cover this half-dozen drawer dresser piece.
.
And then, if yous're set up to get building, let's go. I've got all the plans, dimensions, and details below and the video tutorial right hither. This post contains chapter links. Come across policies.
For this six Drawer Dresser, You Will Need:
- (1 ½) sheets ¾″ plywood
- (four) 2x2x8 boards
- (1) 1x2x8 board
- (three) 1x3x8 boards
- Cove molding (optional)
- (6) 16″ drawer slides (I buy the ten pack because they're cheaper per slide)
- (six) drawer pulls (<–y'all can purchase these in bulk for cheaper)
- (half dozen) locks (optional)
- Kreg pocket hole jig
- Miter Saw
- Circ Saw
- Drill
- Blast gun
- one ¼″ pocket pigsty screws
- 2 ½″ pocket hole screws
- i ¼″ woods screws
- 2″ wood screws
- Paint and Stain
- Edge banding (optional)
Printable plans for the entire entertainment center (which includes this dresser) tin exist found here:
Step 1: Build six Drawer Dresser Side Panels
Like nigh of my dressers, I started off by building the 2 side panels. I built this dresser frame from 2x2s and used plywood for the inside panels. I've got a post here for how I cut my ain 2x2s and some other post hither on how I cut down my plywood sheets.
.
Once I had my dresser legs (2x2s) and side panels (¾″ plywood) cut to length, I simply attached two side panels like shown using woods glue and pocket holes and screws.
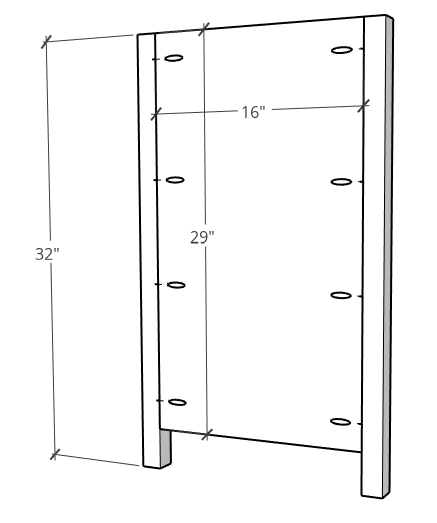
Since these will be covered by the drawers, I fabricated this quick past using ¾″ pocket holes and ane ¼″ pocket pigsty screws. Just in my adjacent piece in this serial, I used dowels. Either way works fine.
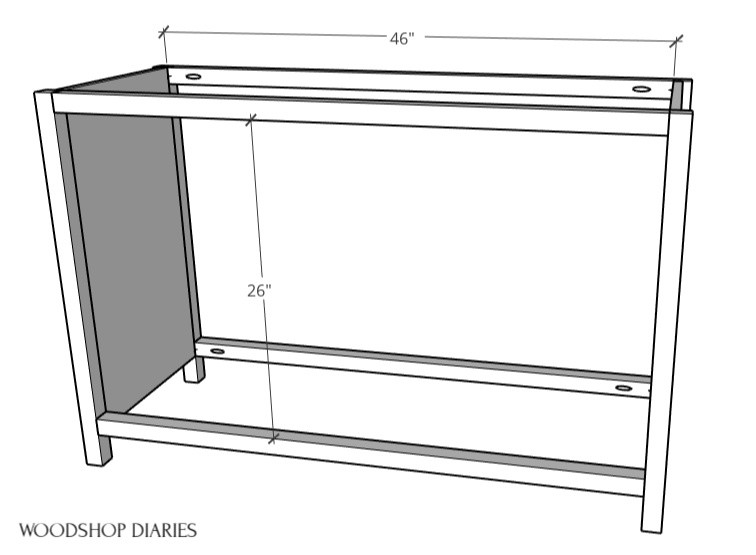
Step 2: Assemble Dresser Frame
Once the side panels were together, I assembled the remainder of the dresser frame using 2x2s at the front and back. I used wood mucilage and 1 ½″ pocket holes with 2 ½″ pocket hole screws…but over again, you could use some other joinery method hither likewise if you wanted.
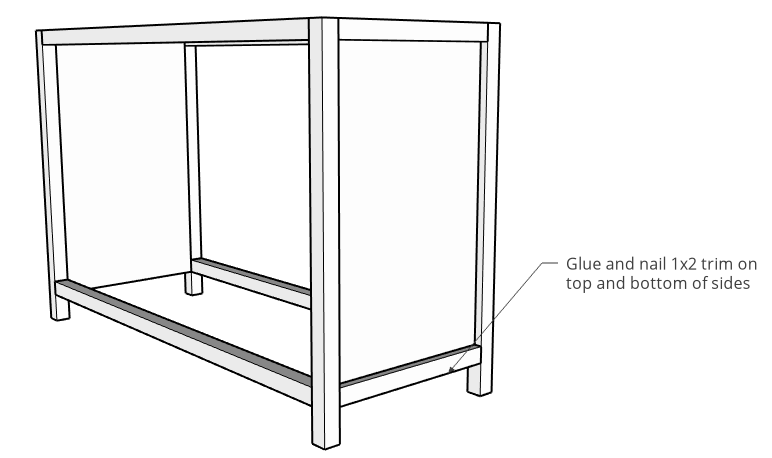
Pace 3: Add Trim Item to Dresser Sides
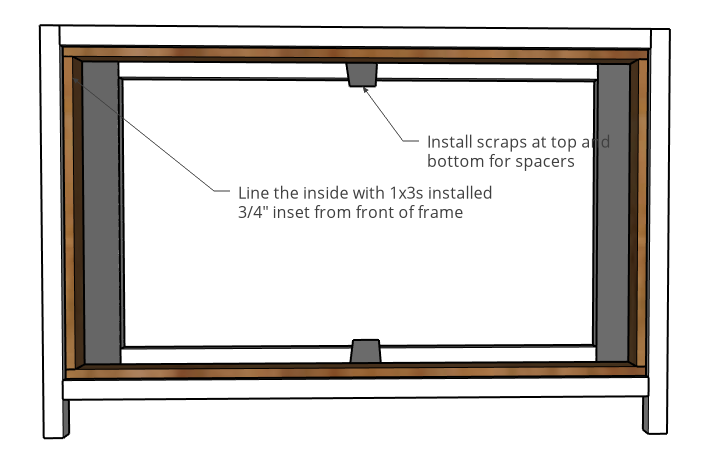
Afterward the frame was assembled, I added a little decorative detail to the sides. I just nailed 1x2s at the top and bottom of the side console, and so I used some cove molding cut to fit to line the inside of these frames.
At this bespeak, everything so far was going to be painted white and everything else following this volition exist stained. So I went alee and painted this frame earlier moving on to the next step.
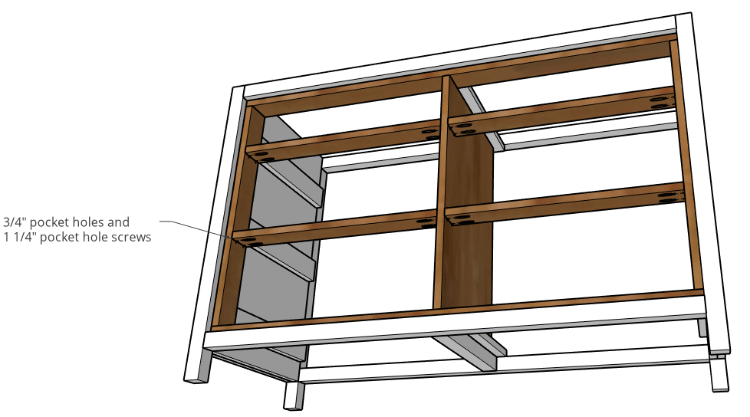
Stride 4: Install Middle Divider and Front Trim
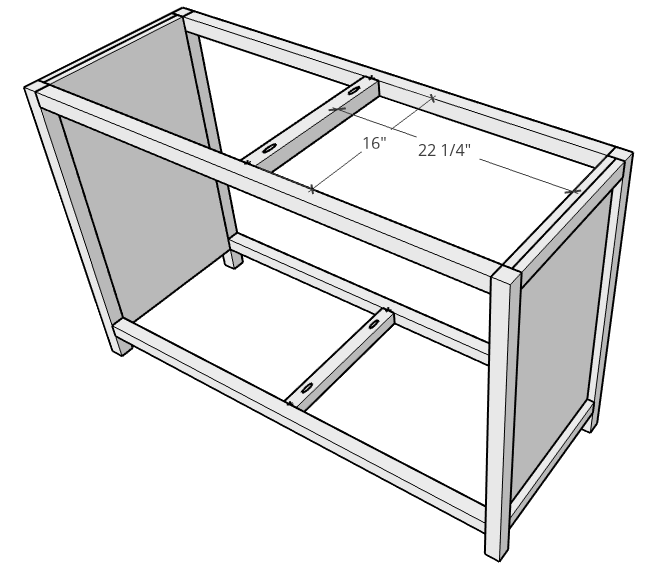
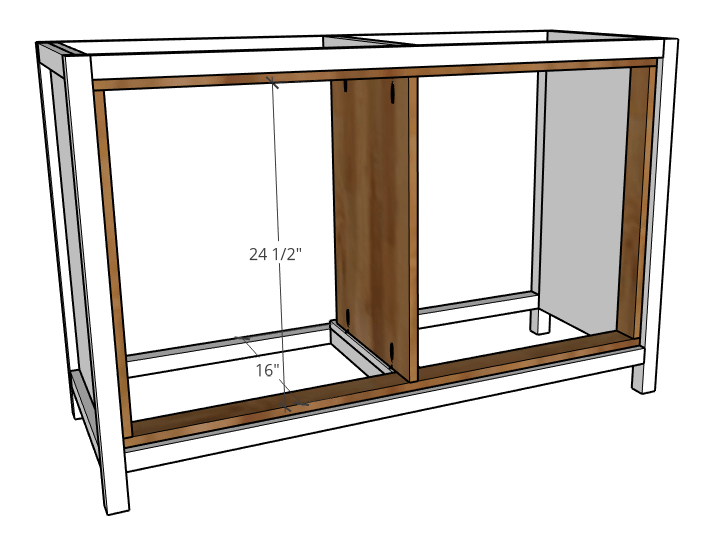
And so once the paint was dry, I moved on to all the inside details. The first thing I did was install two more 2x2s into the middle at the top and at the bottom. I used one ½″ pocket holes and ii ½″ pocket hole screws for this.
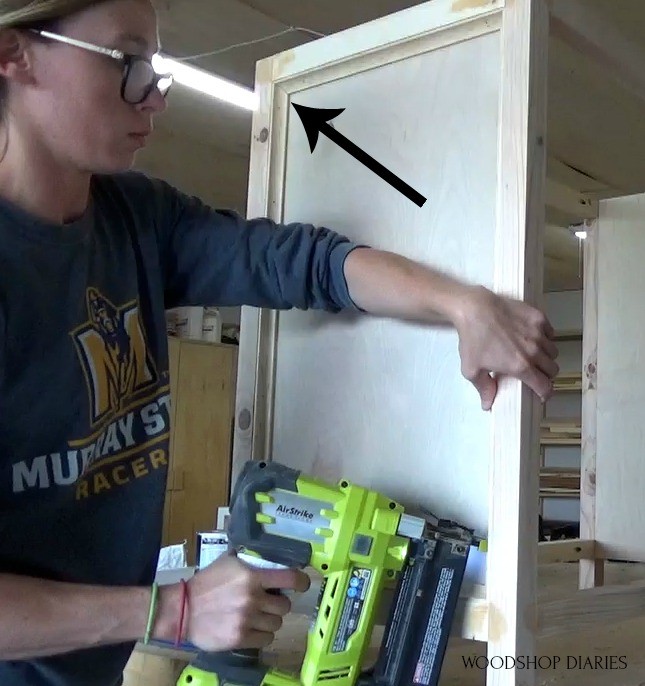
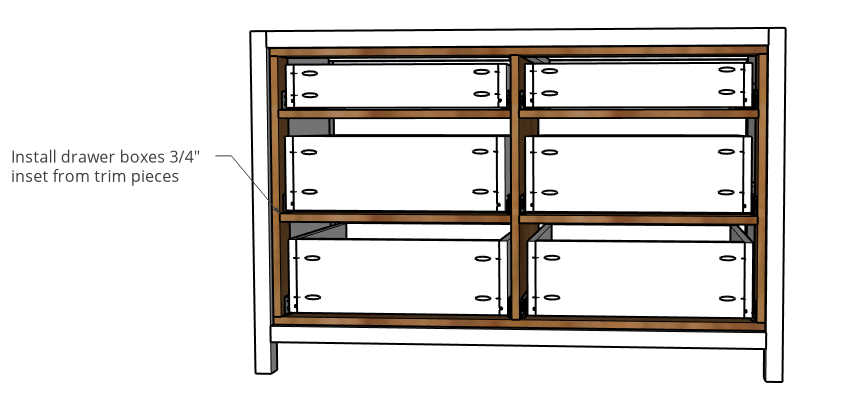
To add together a trivial something to the pattern, I framed out the drawers inside the main dresser frame and inset them about ¾". It's subtle, but I felt it added something to the design.
I used some 1x3s for this and test fit everything together earlier staining (I used Minwax Early American Stain for this) them and installing. I simply glued and nailed the 1×three front trim pieces in place ¾″ INSET from the forepart edge of the dresser frame.
Considering of the spacing, I needed to add together some scrap 1x textile to the 2x2s in the middle before I could install the middle divider, and so I screwed some scrap plywood in place with 1 ¼″ woods screws as seen above.
.
Then, I could add the middle divider between them. I edge banded the front of the divider to cover the plywood edges, then installed it in the eye using ¾″ pocket holes and i ¼″ pocket hole screws like shown.
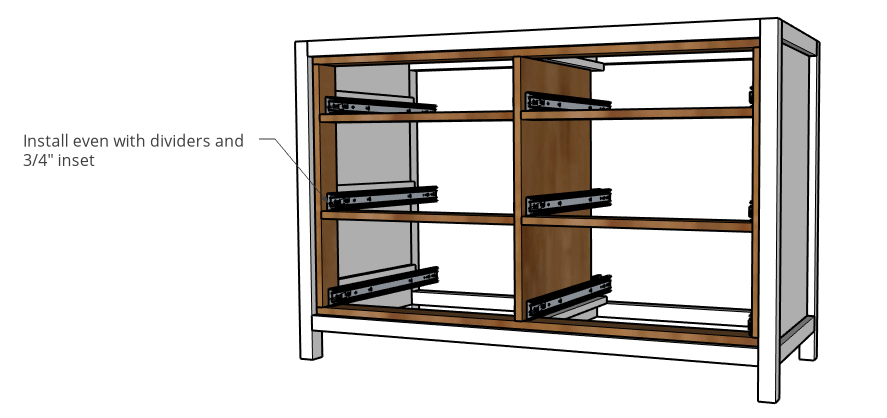
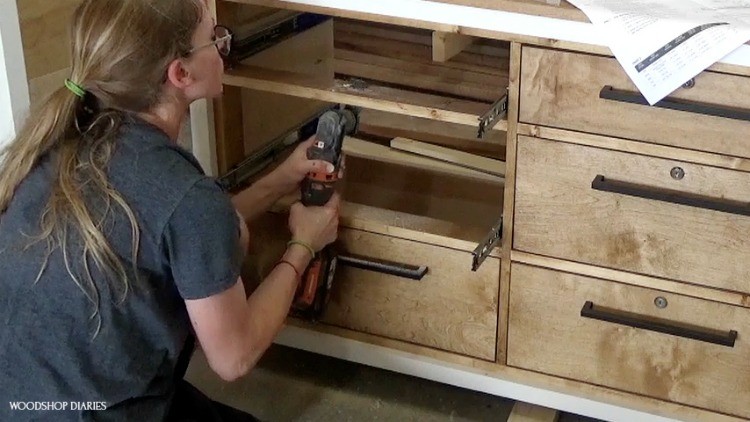
Step five: Install Dresser Drawer Slides
Now, it was time for the drawer slides. I installed half dozen pair of sixteen" soft shut drawer slides into the dresser. To do this on the sides, though, I had to add some more scrap wood spacer blocks where the slides needed to mount.
.
CHECK OUT MY Complete DRAWER BUILDING GUIDE Hither FOR HOW TO BUILD AND INSTALL DRAWER BOXES AND DRAWER SLIDES!
.
I screwed ¾" plywood bit blocks in place using 1 ¼″ wood screws.
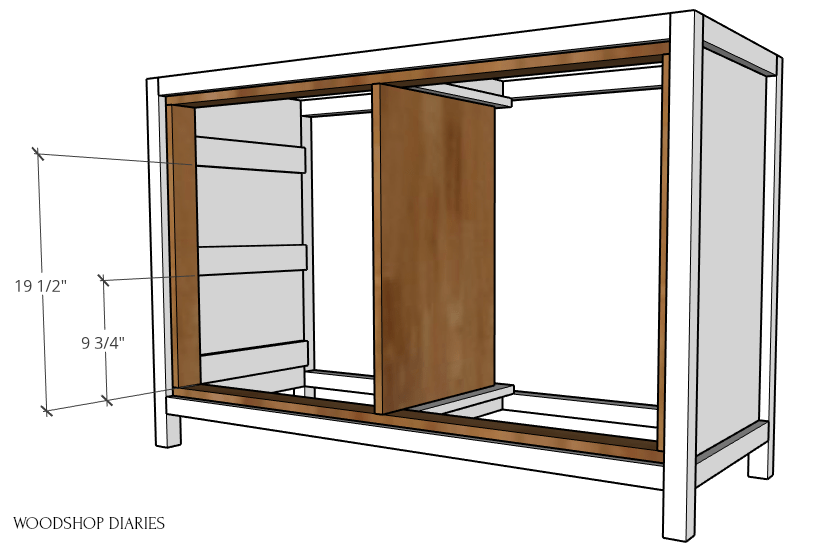
But in the middle, I could mountain these slides straight onto the panel. The trim particular on the front made everything else a little more complicated.
.
At this betoken, I had forgotten that the library had requested that all the drawers and doors on this piece I was making be able to lock. In order to practice that, I needed to install some more 1x3s betwixt each drawer. You'll see later on that the locks will lock into slots cut in these pieces.
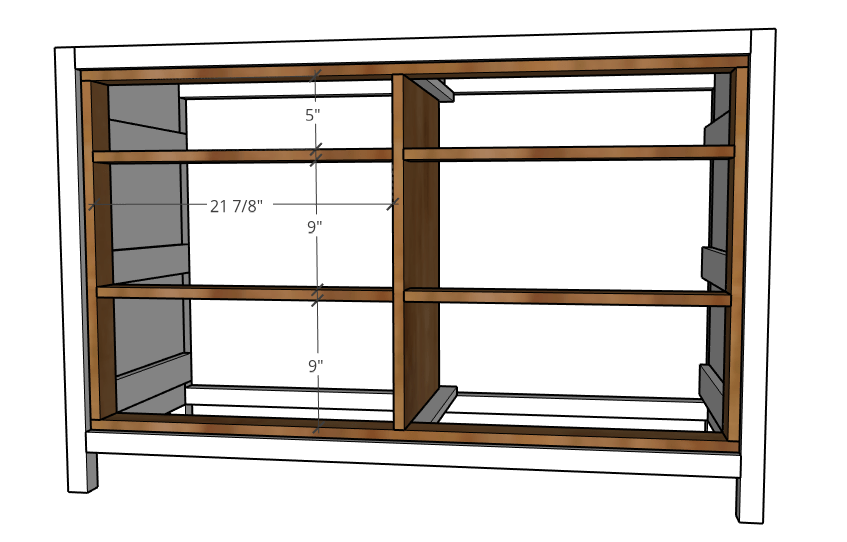
So I installed frame pieces hither using ¾″ pocket holes and 1 ¼″ pocket hole screws to separate each private drawer box.
Then I could finally install the drawer slides similar shown. By the way, I accept a super detailed guide on how to build and install drawers and drawer slides here.
Step 6: Build and Install Drawer Boxes
Now it was finally time to build and install the drawers. Be sure to cheque out the post hither on how I like to build drawer boxes.
.
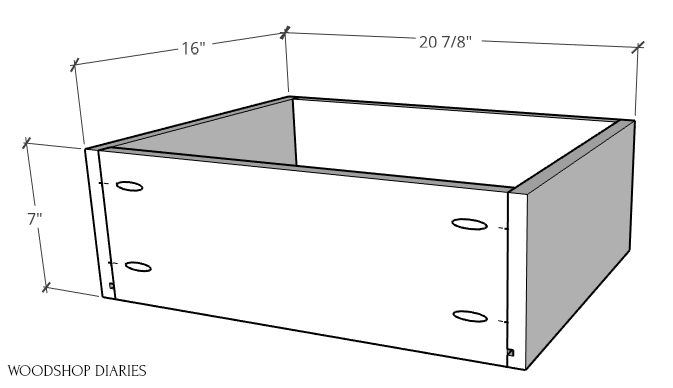
I similar to make my drawers from plywood. So I cutting down my plywood pieces, then cut a dado in them for the ¼″ plywood lesser. I used pocket holes and screws to get together similar shown. I likewise edge banded the plywood for a cleaner expect…but that'southward an optional footstep.
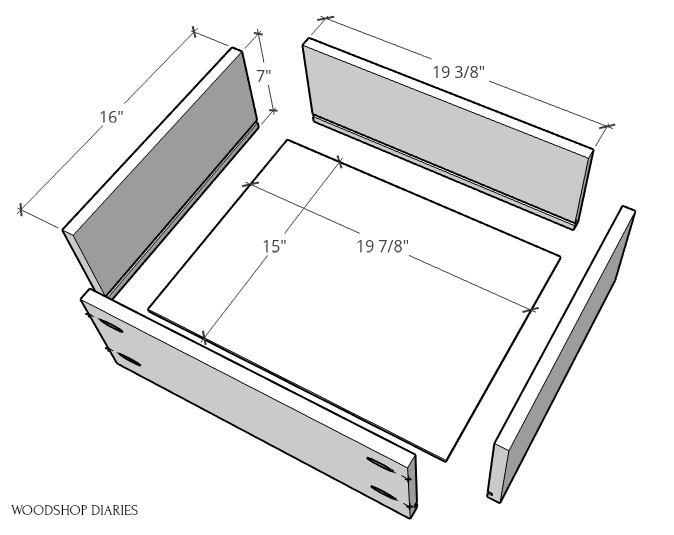
I fabricated four drawer boxes 7″ tall similar shown higher up in an exploded view. And I made 2 more identical EXCEPT only 4″ tall.
By the way, for this particular dresser, I made my drawer boxes shorter (in acme) than I suggest in my drawer building guide. The only reason for this in this particular case was and so that there was more room to place the lock in the drawer front later. If you aren't installing locks on your dresser, feel free to brand these drawer boxes a footling taller.
.
In one case all the drawer boxes were assembled, I installed them into the dresser. I have a super detailed guide for how to build and install drawer boxes and drawer slides I'll link below if you're interested.
Step vii: Install Drawer Fronts
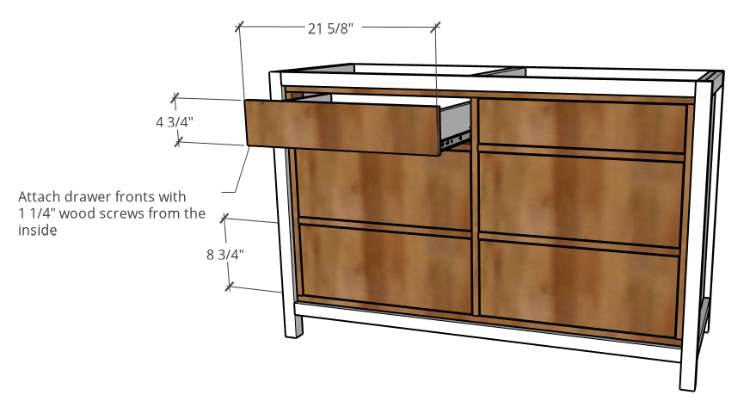
Once the drawers were in place, it was time to add the fronts. I cutting these from plywood as well and covered all the edges with edge banding. Once I made sure they fit, I stained them, then installed them using 1 ¼" wood screws from the inside of the drawer box.
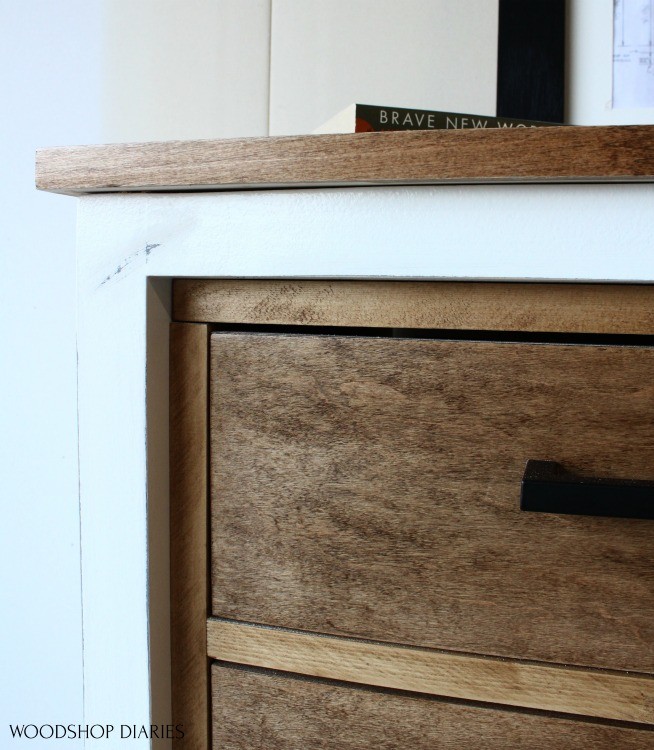
Pace viii: Install Dresser Elevation
The last piece of the dresser was the peak. I cut this from ¾" plywood and edge banded the sides. I figured it would exist easier to stain earlier I installed it, so I went alee and stained information technology.
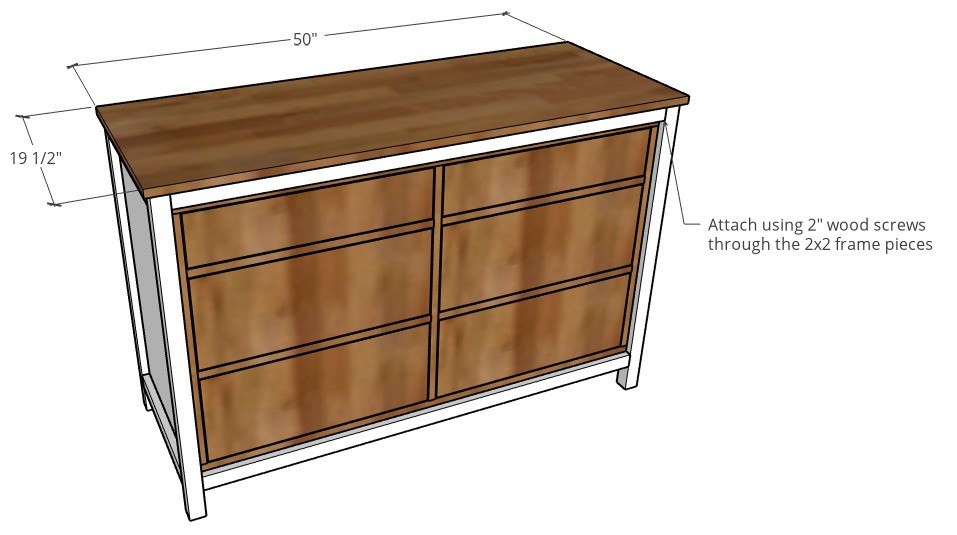
I centered information technology on the base and screwed in place through the frame using two" wood screws at the front and back.
Footstep 9: Add Hardware and Locks (Optional)
I gave the dresser some simple, mod pulls to keep with the clean lines and finally, information technology was time to add the locks.
.
I've never installed locks into my furniture before, so it was a little trial and mistake and I wish I had thought to cut the slots BEFORE installing these pieces, but I approximate now I know for next time.
.
I used a spade bit to drill a hole in the drawer front to insert the lock. These locks accept a tab on the back that rotates xc degrees.
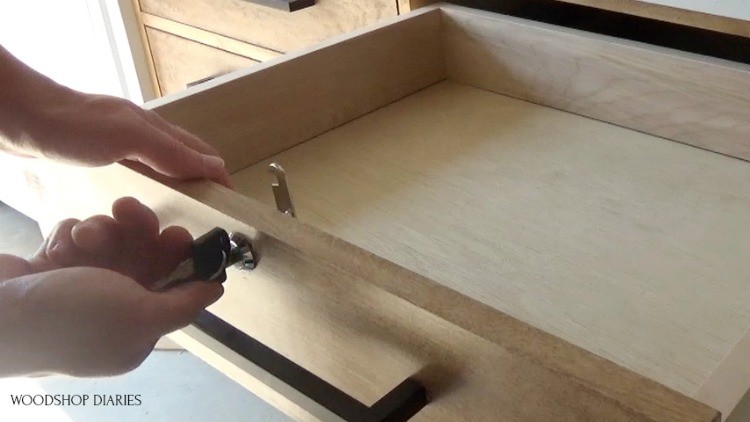
And then once the lock was on the drawer, I closed the drawer, turned the key, and used a pencil to mark where the tab hitting the one×3 above it.
.
Then I removed the drawer (the slides have tabs on the sides to allow yous to remove the drawer hands) and used an aquiver saw with a affluent cutting blade to cut a slot at that mark. I kept putting the drawer in and testing and seeing if or where I needed to take out more cloth.
Once I had the slots cut, the drawers would be able to shut and when the tab was turned upwardly (in lock position), it would go into these slots so they would stay locked until the central was used to plough the tab dorsum sideways.
.
To terminate up, I gave it a lilliputian sorry and it got a few coats of poly (I used Minwax Polycrylic Water Based Semi Gloss). And then, it was finished and prepare to use.
.
It's definitely not a fancy, elaborate dresser by any means. But it'due south elementary and clean and I think information technology's going to be a great base for the rest of this entertainment center to be built around.
Don't forget to check out the rest of the entertainment centre series in these posts:
DIY Pocket Door Cabinet
DIY Sliding Door Cabinet
.
If yous're enjoyed this build, don't forget to pin this for later and head over to my DIY furniture project page for more building plans and inspiration 🙂
Until next time, happy edifice 😊
Source: https://www.woodshopdiaries.com/diy-6-drawer-dresser/
0 Response to "Plans for 6 Drawer Dress"
Post a Comment